Frugal Install Tiny Core Linux
| 0. Introduction |
| 1. Start the installation |
| 2. Browse to the install files |
| 3. Formatting |
| 4. Bootcodes |
| 5. CorePlus installation options |
| 6. Tiny Core installation options |
| 7. Install |
| 8. Testing |
0. Introduction
The first step before you install any operating system such as Tiny Core is to back up everything on your computer before starting.
Before making the commitment to perform a frugal install you should consider our Quick and Easy Overview. It covers the basics of running Tiny Core from CDROM and/or USB pendrive. Most will find learning Tiny Core the quick and easy way a better starting point.
But for those who are ready to take the plunge to frugal, this guide shows step by step information on how to install TC via the installer. The older instructions for a manual install are still available, but using the installer is recommended.
The guide assumes you've either booted the CorePlus CD, or have installed the tc-install extension (tc-install.tcz)
Keep in mind that this guide is basic and that the user may choose to adapt, remove and/or add parts as desired.
The installer is also applicable to USB sticks and other external media.
Note: If you already have a Linux System booting, then you do not need to make a partition for Tiny Core! Tiny
Core can run in a single directory in your existing Linux installation.
To do so, at step 1, uncheck the option to "Install boot loader". At step 2, select an existing partition, and at Step 3, do not format it. Upon completion you will need to manually configure your existing boot loader.
1. Start the installation
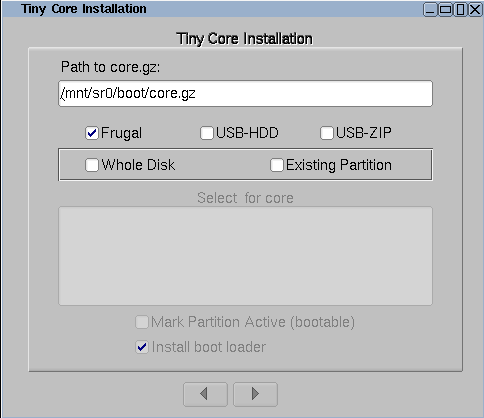
Open the installer:

It can also be started via the shell or Run icon by typing "tc-install".
2. Browse to the install files
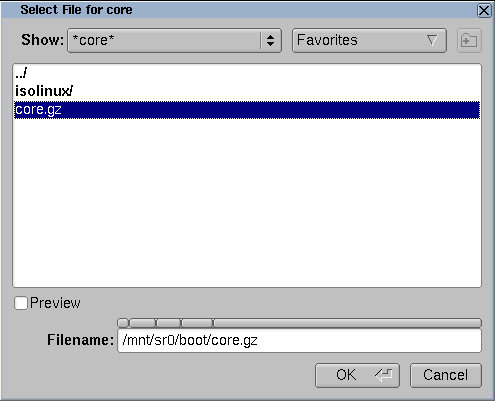
Browse to /mnt/device/boot and select the core.gz file.
With the source selected, pick the desired install type and target. We're going to install
to an empty hard drive.
If using an existing partition, tick the box to mark it active to have it bootable.

3. Formatting
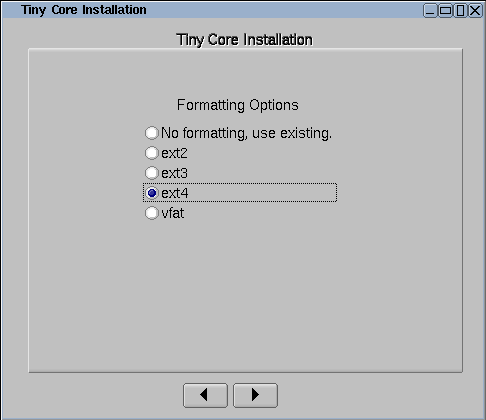
Format the new partition. It's recommended to pick one of the ext* options to support linux permissions.
4. Bootcodes
If you want to use additional bootcodes, enter them now. Otherwise leave this blank.
The example bootcodes set a framebuffer resolution and disable wbar icons.
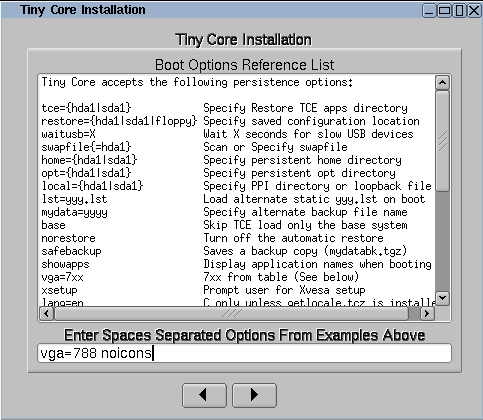
Note that you can edit them any time after the install in the bootloader's config file, usually extlinux.conf.
5. CorePlus installation options
If you are installing from the CorePlus CD you will see an additional screen asking which extensions from CorePlus you would like to install. Note that you will only see this screen if running the installer from a CorePlus CD.
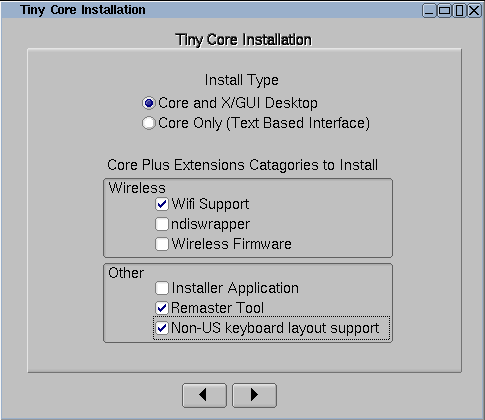
The selected extensions will be installed.
6. Tiny Core installation options
If you are installing from the Tiny Core CD you will see an additional screen asking which directory extensions should be installed from. You should select the cde or tce directory that contains the extensions that you would like installed. For example, if the Tiny Core CD is mounted on /mnt/sr0 you should select /mnt/sr0/cde
Note that you will not see this screen if installing from CorePlus.
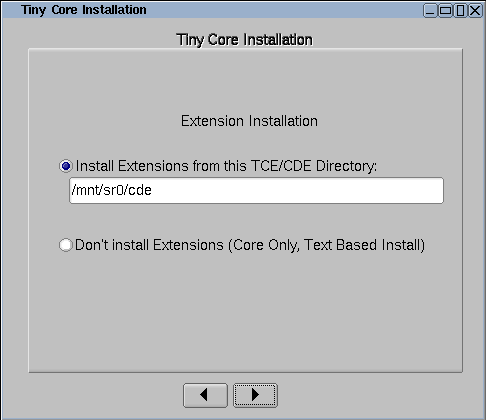
All extensions from selected directory will be installed.
7. Install
If everything's OK, click on proceed:
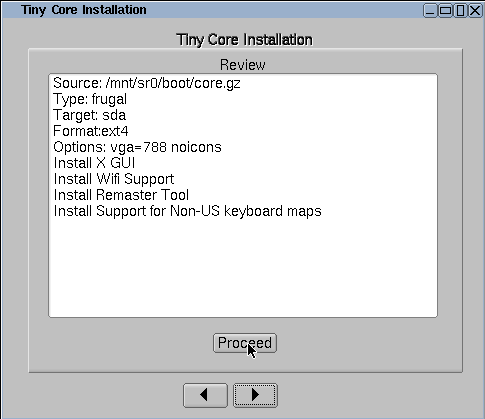
The time required will depend on the size of your hard drive.
8. Testing
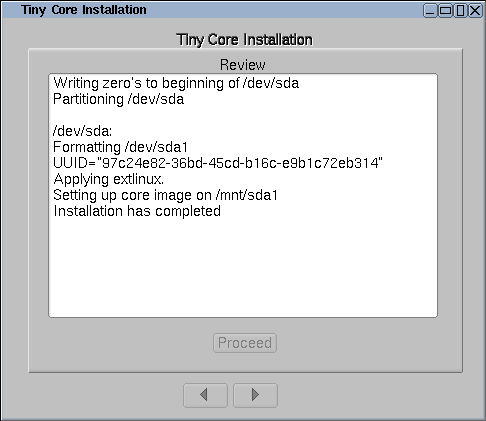
TC is now installed!
Remove the original CD boot media and reboot.
Note: the system may need to be configured to boot hdX first in the BIOS.